Audi A4: Special Tools
Special tools and workshop equipment required
- Locking Pin -T10060A-

- Engine Support - Supplement Kit - Adapter -T40093/6- from the Engine Support - Supplement Kit -T40093A-

- Clutch Module Assembly Aid -T40169-

- Clutch Module Transportation Lock -T40170-

- Wrench - 21mm -T40263-

- Adapter -T40314-

- Torque Wrench 1332 Insert - Ring Wrench - 16mm -VAG1332/14-

- Shop Crane -VAS6100-

- Engine Bung Set -VAS6122-

- Coolant Collection System -VAS5014- or Shop Crane - Drip Tray -VAS6208-

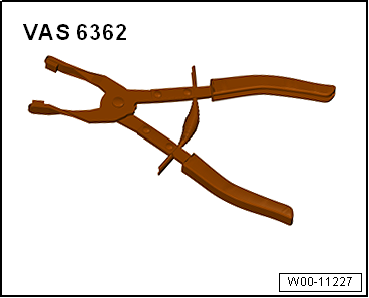
- Hose Clip Pliers -VAS6362-

- Torque Wrench Adapter -VAS6948-

- Engine Support Bridge -10-222A-

- Engine Sling -2024A-

- Engine Support Bridge Adapter -3147-

- Ring Wrench 7-Piece Set -3337-
- Not illustrated:
- Engine Support Bridge - Spindle -10-222A/11-
- Engine Support Bridge - Sub-Frame Adapter -10-222A/22-
- Engine Support Bridge - Spindle -10-222A/11-

READ NEXT:
 Cylinder Block, Belt Pulley Side
Overview - Cylinder Block, Belt Pulley Side
All components are described under:
→ Servicing - 4-Cylinder 2.0L 4V TFSI Engine; Rep. Gr.13; Cylinder Block Belt
Pulley Side; Overview -
 Balance Shaft
Overview - Balance Shaft
1 - Cylinder Block
2 - Bolt
Tightening specifications. Refer to
→ Servicing - 4-Cylinder 2.0L 4V TFSI Engine; Rep. Gr.13; Balance Shaf
SEE MORE:
 Lap timer
Introduction
Applies to: vehicles with lap timer
You can record and evaluate lap times with the
lap timer. You can operate the lap timer using the
multifunction steering wheel.
Opening the lap timer
Select in the instrument cluster: Vehicle functions
tab > button > Lap times.
An additiona
 Rear Seat Belt Guide, Removing and Installing
Seat Belt Guide in Rear Seat Backrest, Removing and Installing
Special tools and workshop equipment required
Trim Removal Wedge -3409-
Removing
- Remove the center rear belt end fitting. Refer to
→ Chapter "Rear Seat Belt Latch, Removing and Installing".
- Release the catches -1-
© 2019-2025 Copyright www.audia4b9.com

